And this why I was very excited to eventually get my hands on some Rubicon Models kits. Since setting up shop a year or two back, Rubicon has been producing 1/56th kits - a pure wargaming scale - that, if the chatter on the internet is to be believed, are more scale model kits than wargaming kits. However, the lack of a local distributor and a limited range of online stockists had meant the kits were relatively hard to come by, and the landed price ended up being a fair bit higher than their competitors. This is about to change (more about that later), so I decided, as a taster, to build one of their more recent kits, the A15 Crusader.
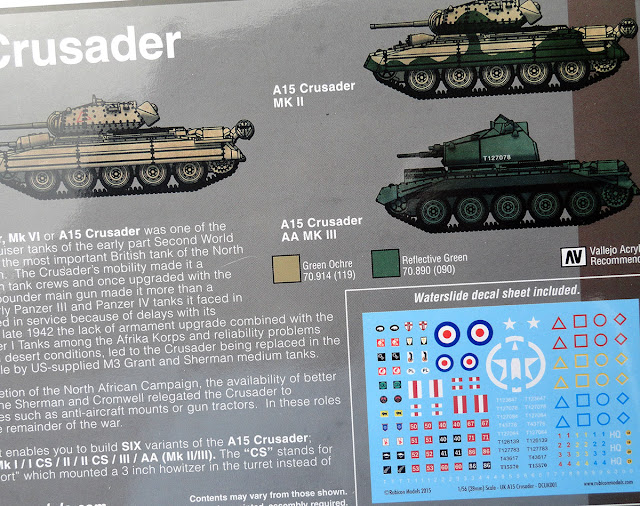
So whats in the box? Three, individually wrapped (so parts knocked off don't float around the box) sprues of dark green-grey plastic, a comprehensive instruction sheet and a very practical decal sheet. The plastic is harder than the grey Renedra/Warlord/etc plastic that wargamers are more used to - this is much closer to the hard plastic found used in scale model kits from, say, Tamiya or Dragon.
Included on the sprue are options to build 6 (!) variants of the Crusader - from the mid-war Mk 1 to to the late war anti-aircraft platform.
Limited painting and marking instructions are included on the back of the box.
Detail is crisp and casting is excellent. No flash, no warping, and ejection pin marks and split lines are kept to the absolute minimum.
So how does it build? Very very well. The fit of parts is superb, and the kit's breakdown has been very cleverly designed, meaning joins fall in logical places. The quality fit gave me the confidence to build quickly - there was no need to file or sand parts (apart from where parts where clipped off the sprue), or use any filler. Even normally tricky items that often need pinning - open hatch covers, for example - had a clean, precise fit and were simple to implement.
There are some impressive little build details which show the designers have really thought through the process of using the kit. Example 1: as well as provide castings of the headlight guards, the kit includes a little bending template for those who want to use wire to create a more accurate scale result. Example 2: on the inside of the turret are guide holes corresponding to the positions of the antennae. So if you want to add antennae, just drill through the turret top armour using the guide holes...
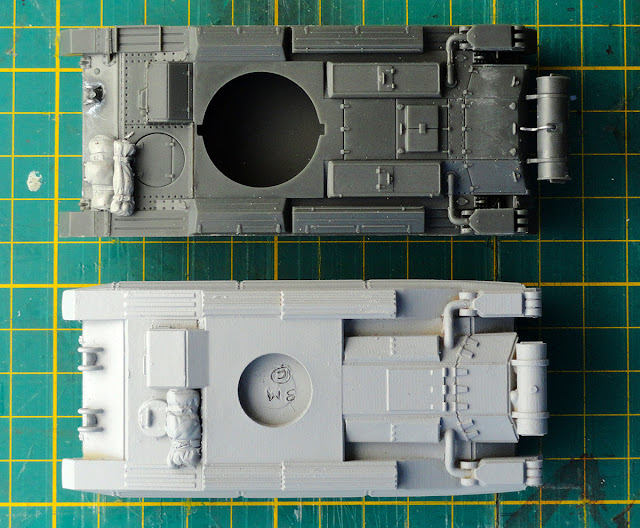
How does it match up? I am no Crusader rivet counter, but the impression I get is one of attention to detail, and I am inclined to trust the Rubicon team to have done a very good job. I happened to have an unpainted Blitzkrieg Miniatures Crusader A15 on hand, and overall dimensions are almost identical. They do, however, differ considerably in their geometry - especially on the engine deck and stowage bins. The Rubicon kit has plenty more detail, but that is a bit of an unfair comparison, as the Blitzkrieg kit is unashamedly a wargaming product - it has only 4 parts. The Rubicon kit goes together much more cleanly than any Warlord/Italeri plastic kit that I have built. From a detail point of view, the only comparable 1/56th products are probably the JTFM/Waffenkamer resin kits, which although of obvious high quality, are more fiddly to build and paint.
What am I going to do with mine? It just about fits into my South African 6th Armoured Division force, but not quite. The division used battered ex-8th army Crusaders for training, but they were replaced by Sherman Vs before they left Egypt for the Italian theatre. (All the Crusaders were then shipped back to South Africa, where at least 5 are still on display outside MOTH halls, and another 3 in military museums). So in a bit of a deviation from my usual fare, I am planning to finish mine as a 8th Army vehicle in Tunisia. I am set on a Desert Pink-Blue Black pattern, but I haven't gotten my head around which 8th Army units still had Crusaders in Tunisia and which used that pattern. Once I have gotten the research done, painting can commence.
I used the wire-bending gizmo for the headlight guards, and added a pipe from the auxiliary fuel tank to the engine bay (also using fuse wire). I have added some stowage. The rear engine deck does not appear from photographs to be often used for crew clutter - maybe because of the limited clearance of the main gun over the rear deck (answers on a postcard please). Most pics show that a popular stowage position was to the left of the drivers position, or strapped behind the left headlight guard. To create a realistic "settling" of the stowage, I press-moulded some of the JTFM stowage pack items, and then, while the putty was still not fully set, worked them into the stowage spaces. (This is a technique I use for most "pliable" stowage).
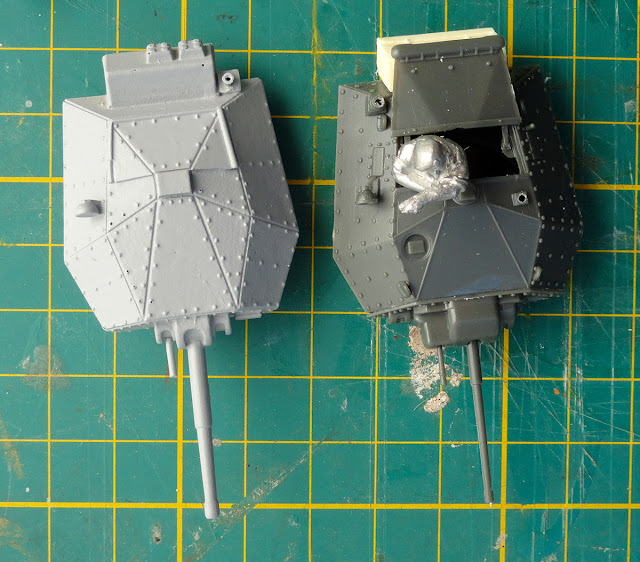
Because I could, I built both a Mk II and a Mk III turret, which will allow the miniature to be used in a wider spread of games. There were just about enough parts to be able to build both versions - I was only short a second turret bin, but I had a spare from a JTFM stowage pack. Commander figures are from JTFM (resin) and Perry Miniatures (metal). Wooden ammo case from JTFM, captured Jerry cans from Warlord Games.
I mentioned at the start of this post that in the past Rubicon kits had been relatively hard to come by in South Africa. I believe that from later this year they will be sold locally - if you are interested contact Anthony (vandijk@iafrica.com) for availability and pricing.


