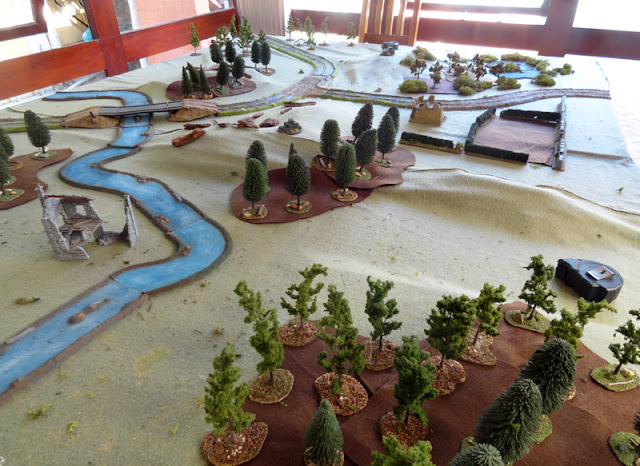
Not more than 25 kilometers from central Cape Town is a battle site that has been so successfully forgotten and obscured, that few local residents (even those living on its fringes) know anything about it, despite it counting as one of the most significant and interesting battles in our nation's history: Blaauwberg, January 8, 1806.
In an attempt to invade and wrest control the Cape of Good Hope - then a strategic port on the lucrative trade route to India - from the French-allied Batavian Republic, British warships landed of force of 3000 regulars - including an elite Highlander Brigade - under the command of veteran Lt General Sir David Baird. They faced a mixed force of locally-raised militia dragoons, jaegers and artillery, Batavian and Waldeck regulars and French sailors led by the Governor of the Cape, Lt General Janssens.
Taking advantage of the difficulties of defending the long coastline, the British landed almost unopposed, but were then met on the slopes below Blaauwberg hill by the more mobile Batavian "reaction force".
Janssens, outnumbered and commanding a mostly untested force, realised he would be very unlikely to defeat the British, but planned to inflict a blow on the invaders before retiring his force into the Hottentots Holland mountains, where he hoped to conduct a "guerilla-style" campaign against the British on ground suited to his mixed force, while waiting for French reinforcements.
However, his plans were dashed when the centre of his line - comprised of his trusted Waldeck regulars - buckled in the face of a charge by the Highland Brigade, and on the day a comprehensive victory was claimed by the British.
Compared to the grand battles happening in Europe at the time, it was not much of a set piece - no more than 5000 troops took the field, and casualties - missing, dead and wounded - amounted to at most 600 (exact casualty figures are unknown and disputed). Excluding skirmishes occurring on the days before and after that battle, it was over in a matter of hours.
So why is it significant?
First, (and I have to thank local author and historian Willem Steenkamp for this perspective) it represents a turning point in the history of the region, as it marks the start of a period of aggressive British colonialism in South Africa, fundamentally changing the course of our history.
And, (again, owing this insight to Steenkamp) it involved prototypes of the definitive soldier of South African history - the mounted rifleman.
And why is it interesting, and especially interesting to wargamers?
First, it is the only Napoleonic battle in the region, and the only battle in our country's history where both sides used the European-style military tactics of the time in a symmetrical battle.
Second, it involved a range of units unique to the Cape, all with distinct uniforms - the Javanese Foot Artillery Corps (which despite their name were locally raised), the Burgher militia, the Hottentot Light Infantry, and the Kaapse Jaegers.
Third, the battle is so little known, and so little celebrated or commemorated, that its almost as if it was been deliberately erased from memory. No monuments mark the site of battle. Not a single grave is marked or recorded. Despite attempts in the 1950s (when the site was more open and less covered in vegetation) to find grave sites, none were found. Even the casualty records are incomplete - and even by the standards of the day remarkably sketchy. The exact position of the battle lines is still a mystery, as we are reliant on rough contemporary sketch maps for our understanding of the encounter.
However, three locally-published histories of the battle are currently in print: Steenkamp's "Assegais, Drums & Dragoons" - Anderson's "Blue Berg", and Krynauw's "Beslissing by Blouberg". For more information see the reference gallery I have started.
View Larger Map
Conservation efforts
The Blaauwberg battle site has been threatened by the northward urban sprawl of the metropole's western seaboard suburbs. Thankfully, recently, the majority of the site has been incorporated into a reserve, the Blaauwberg Conservation Area. The BCA is focused on preserving both the natural heritage (the reserve includes almost-extinct Strandveld, West Coast Renosterveld and Sand Plain Fynbos) and the cultural heritage (as well as the battle site, pre-colonial Kwenna/Khoi middens and burial sites occur within the reserve).
However, there is currently no public access to the battle site, except in the form of overnight accommodation available in an old military installation near the top of Blaauwberg Hill which overlooks the site.
Recently, I was privileged to meet Roy Fuller-Gee of the Friends of the BCA, who is hopeful of the role local wargamers can play in re-introducing the battle to the general public. Roy has kindly offered to take members our wargaming club on a tour of the site. Publicity aside, he also sees a role for wargamers to help model the battle and gain insight into the potential locations of battle lines, which in turn might guide archeological teams who are beginning the huge task of surveying the site. Its not often wargamers get asked to "give back" to community projects, and this is one that is so close to our interests and so close to our homes.
A website centred around the 200-year anniversary of the battle is to be found here and some images of the small re-enactment can be found here. A short article by Willem Steenkamp in the South African Military History Journal is here. For what its worth, the Wiki article on Blaauwberg is here .
Monday 20 May 2013
Thursday 9 May 2013
28mm South African Armour: Italy 1944
In my opinion, 28mm World War 2 gaming is, by definition, skirmish gaming. If you want to represent encounters with more than a platoon on the table, 20mm, 15mm or even 6mm are more suitable scales. And in the context of a skirmish game, a single armoured vehicle of any description is a big deal. A game changer. And a tank is a very big deal, and is sure to dominate the table.
So it was with some hesitation that I started painting up armour to support my Springbok footsloggers. I began with lightly armoured vehicles (an armoured car, and a universal carrier) thinking that they could open up some scenario options without having too much of a negative impact on the game. Since then I have really enjoyed the modelling aspect of building the armour, and have (very) slowly been adding vehicles to my South African force.
My plan is to build a selection of the vehicles used by the South African 6th Armoured Division in Italy in 1944 and 1945. I dont want to field any coherent or complete unit, but to have representative vehicles to use as scenarios demand.
The SA 6th landed in Taranto, Italy in April 1944 (first entering the line at Monte Cassino) and fought northwards until the end of the war. The "Tunisian" pattern of Light Mud and Blue Black was only used until September in 1944, when the entire division was rested and refitted and all vehicles took on the British Olive Drab equivalent.
Divisional Artillery HQ: Humber Scout car
These were mostly used as HQ transport pool vehicles, and few of them acquired the clutter and baggage that you see of vehicles "lived in"by their crew. This is a Warlord Games kit built pretty much "out of the box", apart from the addition of limited baggage and aerials. I used Dom's Decals for the AoS and Bridging marks, and for the WD serial numbers.

Universal Carrier: First/City Cape Town Highlanders Carrier Platoon
Pix show that the FC/CTH carrier platoon jeep was named "Prince Charming", and the eight carriers were named after "Snow White" and each of the seven dwarves. This example is "Bashfull". The Warlord kit is of the Mk2 carrier, but the South Africans used Mk1s, so in time I will replace this with a Mk1 from Die Waffenkamer, or the new Perry/Blitzkrieg Miniatures kit. Added the toolbox and stowage rack. Casual crew member having a smoke ("Sarge told Collins to put on his helmet, and damned if he didnt ignore Sarge and cop some Ted shrapnel later that same day...") is a slightly converted Warlord figure. Decals are a mix of 1/56 from Dom's Decals and the 1/72th set from William Marshall/Starmers Armour. (The jeep pictured below is another Artillery HQ vehicle - from 22 Field regiment who operated Priests and Sextons.)M3A3 Recce: Natal Mounted Rifles
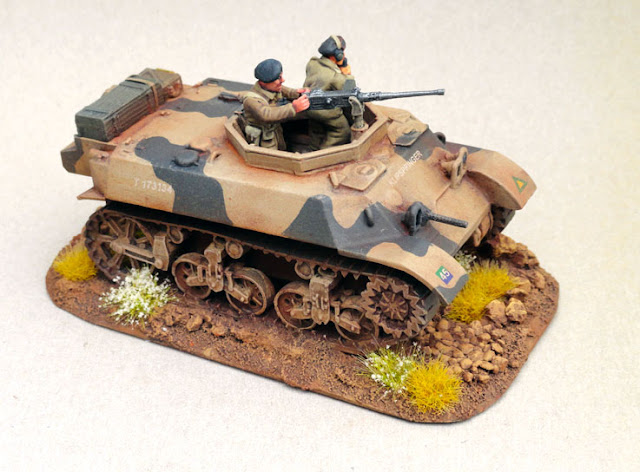
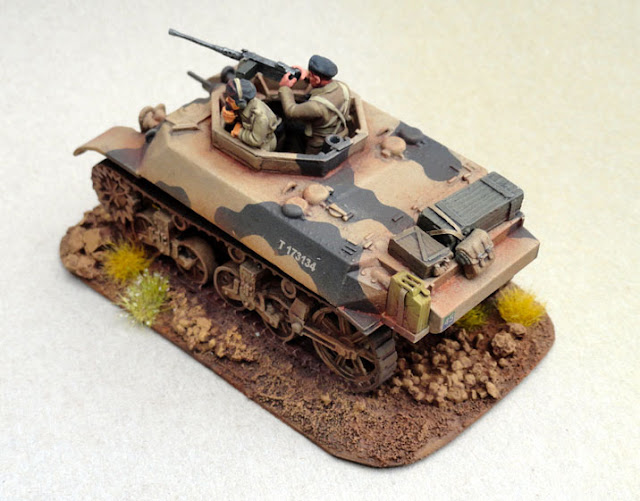
Pix show that these seemed to be armed with a mix of .30 Brownings, .50 Brownings and 2" mortars. This is the absolutely excellent Company B kit - which includes options to build either the recce or the turreted version. Includes more than enough interior detail for a wargaming kit! Again, I added some stowage. Crew are a mashup of Warlord Brit Infantry plastics, and Warlord British tank crews.Sherman V: OP Tank, 22 Field Regiment
Many iconic images of the Springbok Shermans during the Italian campaign are of the OP tanks: perched precariously on hillsides and ridgelines, directing fire of Priests and Sextons (and M10s firing in the field artillery role). The Appennines were no place for tank warfare, but the South Africans used them to support their infantry as closely as they possibly could. Another superb kit, this time from Warlord. I added the turret bin and stowage (and replaced the light cages with fusewire) but otherwise it is stock standard.Friday 3 May 2013
Bolt Reaction
Here are some pix of a Bolt Action game played on May Day by members of the Peninsula Wargames Group. Nine players signed up for the game, and together we just about managed to muster eight commands of 500pts each (28mm WW2 is new to most of the club and we dont yet have the same depth of resources available in other scales). We played a modified version of the rulebook "Hold until Relieved" scenario with 2 objectives - the two hills to the the east (right in the second pic below) of the road intersection. The veteran Guards of the Workers and Peasants Red Army, motivated by the auspicious date, pressed home an attack against a scratch force of regular Heer infantry and veteran mechanised Waffen SS, supported by a solitary Hetzer.
 |
| Forces awaiting deployment |
 |
| Table awaiting deployment |
 |
| Soviet commanders plot their deployment, with a German aerial reconnaissance team ensuring accurate documentation of enemy positions... |
 |
| Defenders of the southern objective, with the MG42 team keeping a close eye on the advancing snack bowl. |
 |
| Heer reinforcements stick to cover as they move to support the southern objective... |
Subscribe to:
Posts (Atom)


