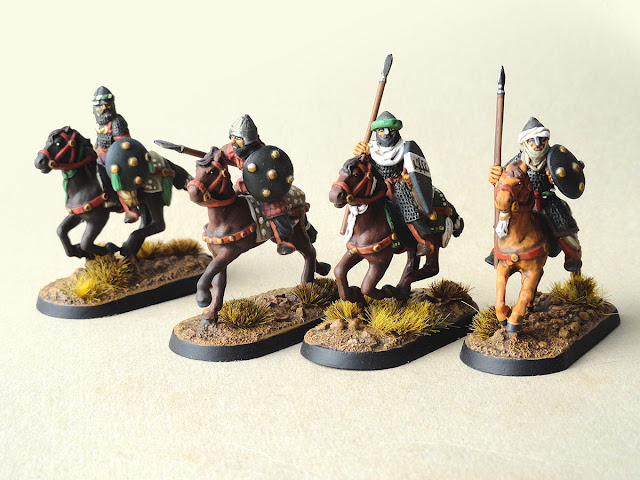
Just off the painting table, the first few points of Moors for Saga Crescent and Cross. In keeping with Saga's somewhat tenuous relationship with historical accuracy, I made a deliberate decision to keep the palette very narrow, muted, and, dare I say it, anachronistic. If anyone asks, I will tell them its a fantasy army...
In keeping with my other Saga figures, I used a fairly quick and simple painting style for these. Not sure if they are my best work, but I think they will look okay on the table.
On the face of it, it can work as a 4pt war band (one unit of mounted hearthguard/Jund, two units of warriors/Hashid on foot, and one unit of levy/Mujahid). By using the Ben Youssef figure as a priest/Imam, I can stretch it to 5pts. While I am not sure it will be effective, I can drop the mounted warlord, and instead field Ben Youssef as a Hero of the Crusade, the armored spearmen as an 8-figure unit of Black Guard, together with one unit of mounted hearthguard/Jund, one unit of warriors/Hashid on foot, and one unit of levy/Mujahid) for a total of 7pts!
The bulk of the figures are from Gripping Beast, and were a pleasure to paint. The crossbow-armed fellows are from Artizan, and were, I am afraid, a little less of a pleasure. Artizan are normally a favorite figure manufacturer of mine, but whether from idiosyncratic sculpting or from tired molds, this batch of figures suffered from a serious lack of detail in the undercuts, some nasty splitlines, and some weird blocks of pewter that made no sense and needed to be filed off.
This represents about the halfway point in the development of this force - twelve more cavalry figures (four x Jund and eight x Hashid) are already underway, and after that, a unit of 8 Bedouin scouts and a unit of twelve archers will round out the core options.
Wednesday, 12 July 2017
Sunday, 9 July 2017
Rorkes Drift: 28mm Black Powder Game
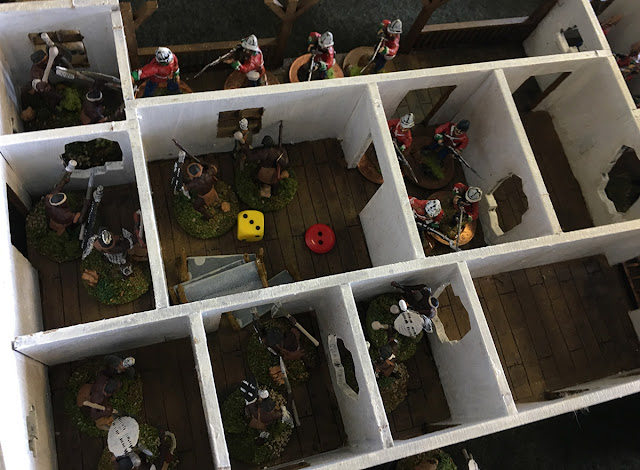
Here be a few images from a 28mm Black Powder game of Rorkes Drift, recently hosted by PWG.
Based on the scenario presented in the BP Zulu! campaign supplement, the game was played on a 6 x 8 table, with 48 figures representing the British, and 280 figures representing the izimbutho of the Zulu.
The British command was split between 5 players and the Zulus between 4 players. One club member volunteered to act as umpire.
In order to make the game playable and balanced, the British units were assigned excellent command and control, and layers of special rules that made them unlikely to panic, while the Zulus had poorer command values, but positive special rules that reflected their eagerness to attack, but which "degraded" after their initial assault.
The game played out to a plausible historical result, with the Zulu's defeated despite breaching the perimeter walls and entering the hospital building. In fact, even when assigned a second wave of attackers, the British held steady and made their superior discipline and firepower count.
Many thanks to Lindsay Hall for contributing the bulk of the figures and the terrain, to Simon Hall for contributing additional figures, and to all the players and umpire. Many thanks to Lindsay Hall, Simon Hall and Richard Trevor for the photographs.
Subscribe to:
Posts (Atom)